
Tutorial
Step 1: Crop and straighten the image
 Crop Tool
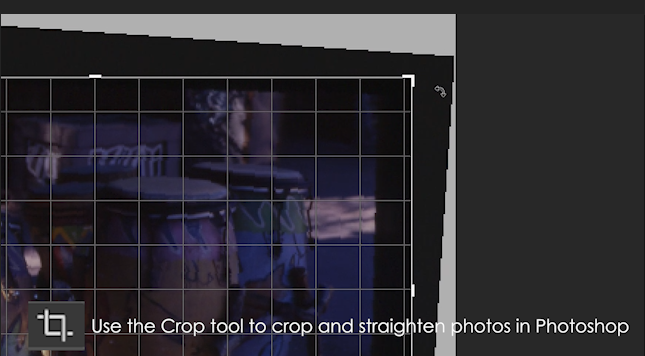
Cropping is the process of removing portions of a photo to create focus or strengthen the composition. Use the Crop tool to crop and straighten photos in Photoshop. The Crop tool is non-destructive, and you can choose to retain the cropped pixels to optimize the crop boundaries later. The Crop tool also provides intuitive methods to straighten a photo while cropping.
You can straighten a photo while cropping. The photo is rotated and aligned to straighten it. The canvas is automatically resized to accommodate the rotated pixels. Place the pointer a little outside the corner handles, it will show a curved line, and drag to rotate the image.
(Adobe,2019)Step 2: Repair small imperfections
 Clone Stamp Tool
The Clone Stamp tool allows you to copy one area of an image onto another area of an image. Photographers and designers use the Clone Stamp tool to remove unwanted elements from a photograph. For example, it can be used to cover blemishes on people's faces (by copying from another part of skin) or removing trees from a mountain view (by copying parts of the sky over them).
To clone from an area of the image to cover blemish; or match the shading & texture of the source with the area to be repaired.
Steps: 1. Select the Clone Stamp tool 2. Option (Alt) +click to select a source area 3. Move curser to the spot 4. Click to complete. (Lifewire, 2019)Step 3: Adjust the overall contrast/tonal range
Levels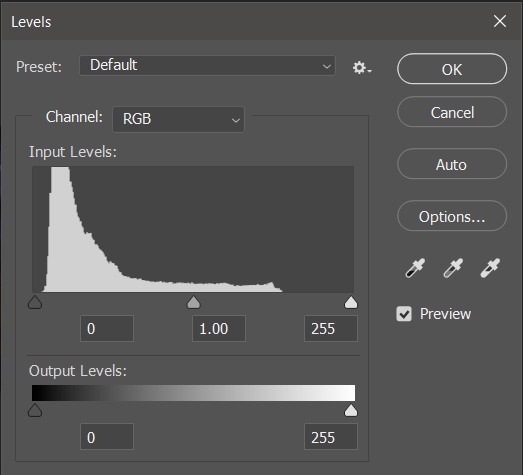
Shown above is the default display of the Levels panel.
You use the Levels adjustment to correct the tonal range and color balance of an image by adjusting intensity levels of image shadows, midtones, and highlights. The Levels histogram is a visual guide for adjusting the image key tones.
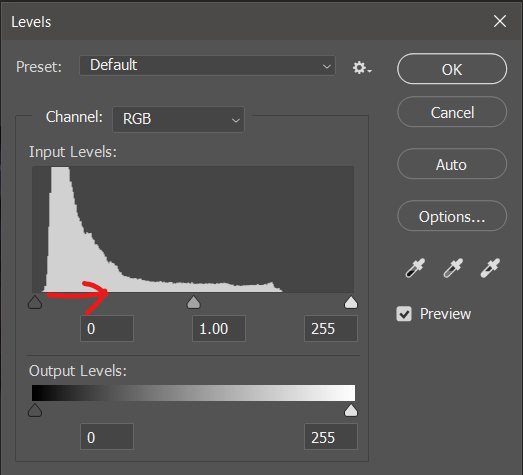
Slide the black marker on the scale to set how bright/dark the darkest colours in the image.
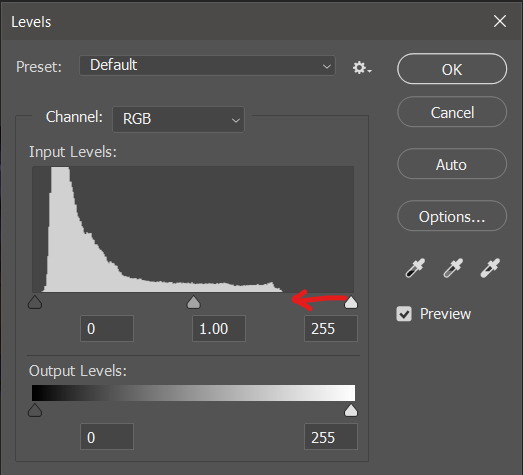
Slide the white marker on the scale to set how bright/dark to brightest colours in the image.
On the Levels panel, either click on Auto (to stretch histogram automatically), or manually adjust the options.
(Adobe, 2019)Step 4: Remove colour cast
Color Balance command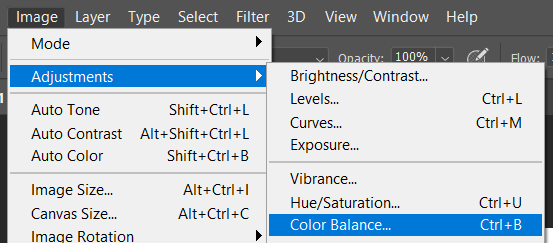
The Color Balance command changes the overall mixture of colors in an image for generalized color correction.(Adobe, 2017)
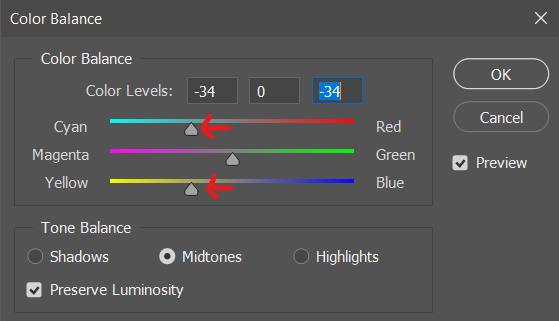
Remove the purple tint, by moving the sliders away from Red and Blue (Red + Blue = Purple)
Step 5: Fine-tune specific parts of the image
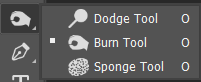
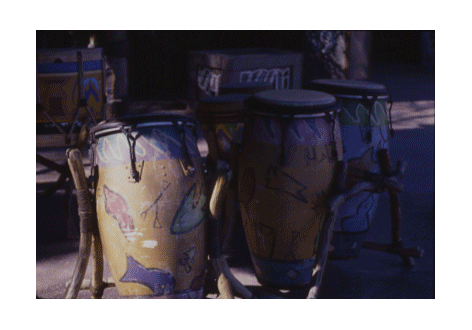
A. Use the Dodge/ Burn tools to exaggerate the lights/shadows of the drums in the centre and back. Use the  Dodge tool to bring out highlights. Use the
  Burn tool to bring out shadows.
B. The Burn can also be used to lower the brightness at the upper left area of the yellow drum in the front, to make the pattern appear.
C. Again, the Burn tool can be used to darken the boxes in the background, to push them further back.
D. The  Sponge tool is used to saturate the red fish shape on the drum.
E. The Clone Stamp is used to retouch the white spots (where the paint has chipped off) on the first drum in front. Select the unaffected yellow paint as the source area.
Step 6: Adding a border & sharpen the image
Adding a border Image > Canvas Size...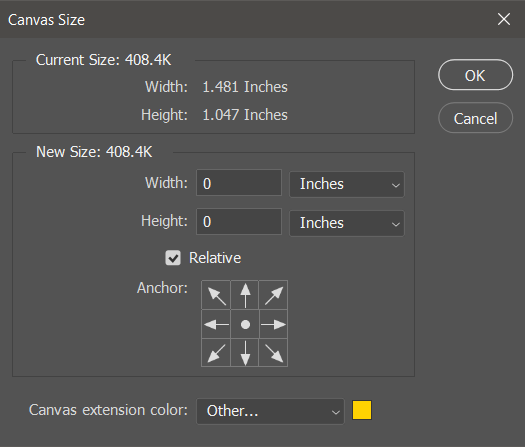
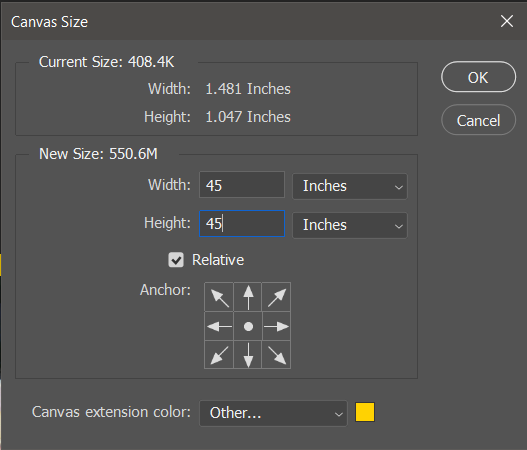
To add borders, tick the 'Relative' checkbox, then change the 'Canvas extention color' to color yellow or any desired colors, lastly, type 45 inches to both width and height.
Go to Filter > Sharpen to sharpen the image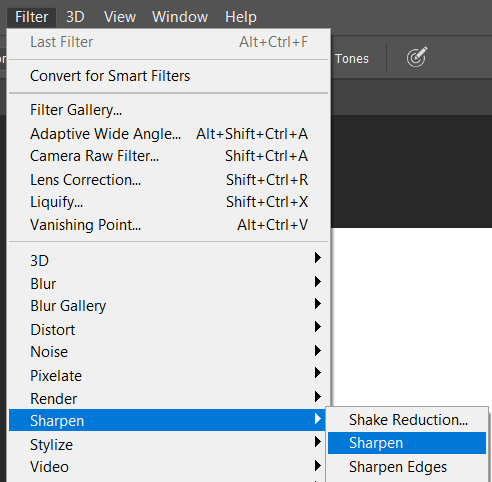
 Drag me for reference!